Saturday 24 October 2009

The Five Doctors

No, the title of the posting is not a reference to the classic 20th Anniversary special from 1983, but to collectively the Third, Fifth, Sixth, Seventh and Tenth Doctors!


Confused?

Well, I have been having a lot of fun recently, slowly expanding the costume pieces I do.
To start with, they all appeared together in the original Tennant Coat or Tennant Suit blogs, but I have since started building separate blogs to cover the costumes of each Doctor, so they are easier to find and digest.

So far I have added the blog you are reading to cover the Five Trousers and Five Coat I have been working on.
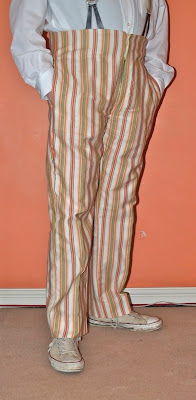
I also added a blog for the Sixth Doctor, to pull out the information about making my Six Trousers.


This past week I have added the Seventh Doctor blog as I have been working on a replica of the Hanky that goes around his hat (see left).

Now I am adding the Third Doctor to the portfolio! This is because I am starting working on making the Inverness Cape he is often seen wearing.
I am doing it as part of the college course I am currently on.

So start checking out my other blogs as I slowly add to them.

Sunday 11 October 2009

Analyzing the Five Doctor costume

Having now done Five Trousers, and being far into doing the Five Coat, it feels like I have done over half a full Davison costume, though there are a number of items to go to make it truly complete.

This got me thinking to write a list of the main costume items worn – though I cannot come close to Bob Mitsch’s excellent Five Breakdown, which is pretty damned definitive.

The list, though relatively short, is slightly complicated by the refresh the costume received for the 21st season. At first glance there is little difference, but when you look closer, not much didn’t change.
The two photographs below are a good comparison between the Season 19 (left) and Season 21 (right) versions.


When the original costume was made back in 1982, several shirts and pairs of trousers would have been made, allowing for spares being cleaned or repaired as well as for stunt doubles. These were used throughout Davison’s first two seasons.
When it came to season 21 in 1984, the wardrobe department completely refreshed The Doctor’s costume, trying (but failing) to match the original version.

Thursday 8 October 2009

Back to the Academy

I am so pleased I have finally cracked all the problems I was having with the calico test of the Five Coat.
Having said that, it has been a long journey and for a while I was going round in circles making slower progress than I would have liked – and using more calico and pattern paper than was reasonable.
I need to do something about this, and it needs a little thinking outside of the (police) box, so to speak.

My solution? Well, I have given it some thought and I think although I can pick up new skills quickly by study professionally made garments, because I am self-taught, there are probably short-cuts and simple tricks I could use if I had some structured training.

I have looked around and found that a local college network runs courses in dressmaking and tailoring to a variety of skill levels. It is not long before courses start and enrolment is very soon, so I a few weeks back I made some enquires and got myself along to West Herts College in Hemel Hempsted to sign up.

Because I have worked in my own little bubble with no contact with others, I truly do not know my skill level.
I am certainly above the ‘beginners’ level, but am I ‘intermediate’ or “advanced’? Which would I get the most from? I don’t want to be on a course that teaches me how to thread a needle; likewise I don’t want to be lost trying to learn couture fashion with corsetry as a speciality!

As it turned out, both the beginners and intermediate courses were full, and had been for some time as they are constantly over subscribed to, leaving me just the advanced as an option. After telling the tutor about the commissions I had been taking on recently, she was perfectly happy to accept me for the course and thought the others would have been too basic for me anyway, which is sorta good to hear.

Tuesday 6 October 2009

Five Coat - Finished calico test

I am not ashamed to say I am a little pooped after finishing the calico test for the Five Coat, but it’s been worthwhile I think.
Click to enlarge picture

After sharing a ‘photo-shoot’ image earlier, here are some more detailed pictures of the finished test.

Five Coat - Lining, then its DONE!

I have now successfully finished work on the body of the coat, and have nailed the pattern for its visible parts (see right).

I now need to sort out the parts hidden from view – the lining.

Compared to doing a Tennant Coat, which required its lining to be installed during pretty much the first few stitches, this will be much easier. The pattern for the lining is with little exception a straight repeat of the outer part of the coat, so I won’t go into too much detail about it at this stage.

The only panels that are different are the inside fronts, which omit the area covered by the lapels and also have the internal pockets set in them. It is this part of the lining I will focus on here.

I have again cribbed the shape of the inside front linings from my charity-bought jacket, cutting it off horizontally at the waist level to match how the Five Coat is constructed (see left, top).

The charity jacket had an internal pocket on each side, so I mark and replicate the angle and position for my Five Coat, based on what I have extracted from the dissected jacket.

Thursday 1 October 2009

Five Coat - Working on the collar


Now that I have sorted out how I will do the inside pockets, my attention turns to the collar and lapels.

The charity-bought jacket I dissected helped me get a much better shape and fit to the fronts.
My plan now is to crib the shape and cut of the lapels, though the collar does not have the correct shape, so I will need to adjust for that (see above, noting the angle of the collar coming away from the notch).

The lapels and collar I am using as a template are, like the fronts of the jacket I did earlier, from a more tailored school and a little different to the method I am used to. I think it is high time learnt some new techniques, so I aim to follow what I find.

The main difference is the underside of the collar, which is made from a thick felt rather than the same fabric as the body of the jacket.

I am working on the basis that this is applied last, so I look first at the structure of the upper collar. This is made in two parts, which at joined at a seam just below where the collar will roll. To create the shape of the collar, the two parts are curved in diverging directions (see right). You could be forgiven to think I have put the lower part upside down, but this IS the way they go together.

I replicated the collar, adjusting the shaping needed as I go, and sew it to the lapel fronts as I would usually do.